We are in the process of setting up a nursery for our first child! It has been so much fun to think of all the possibilities to decorate a room for a new little one and, of course, there is some specialized furniture we will be needing: namely a changing table.
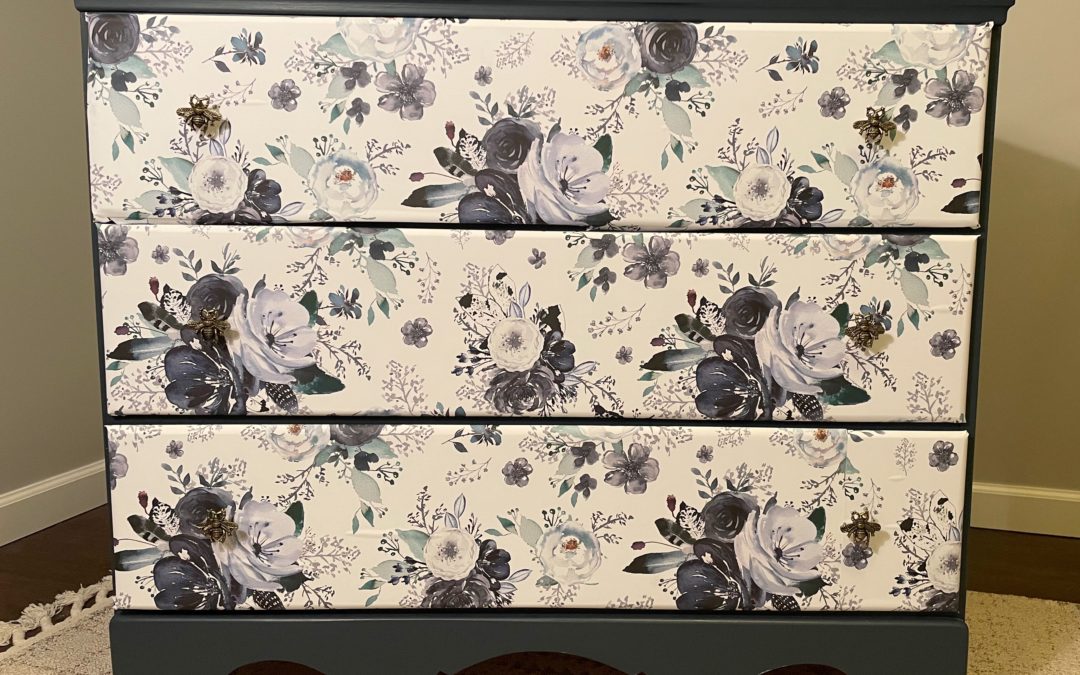
We had an old dresser that had been given to us that we didn’t have an immediate need for so it had been living in the basement. It is shorter in height and longer in width, making it the perfect size for a changing table. There was just one problem—it looked a little dated. My husband does not, in any capacity, understand my desire to paint real wood furniture and I don’t understand his desire to stop me! If we don’t like it we can always use a stripper to remove the paint. It took me months to convince him that it really would be ok to paint the dresser and finally I was able to get busy!
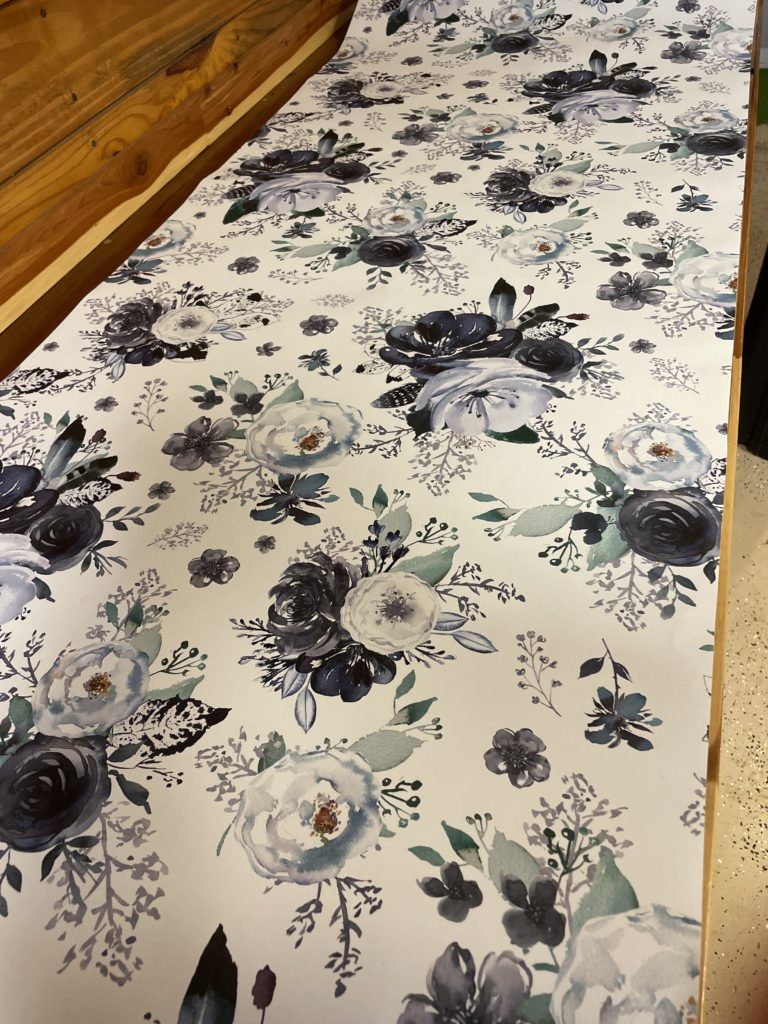
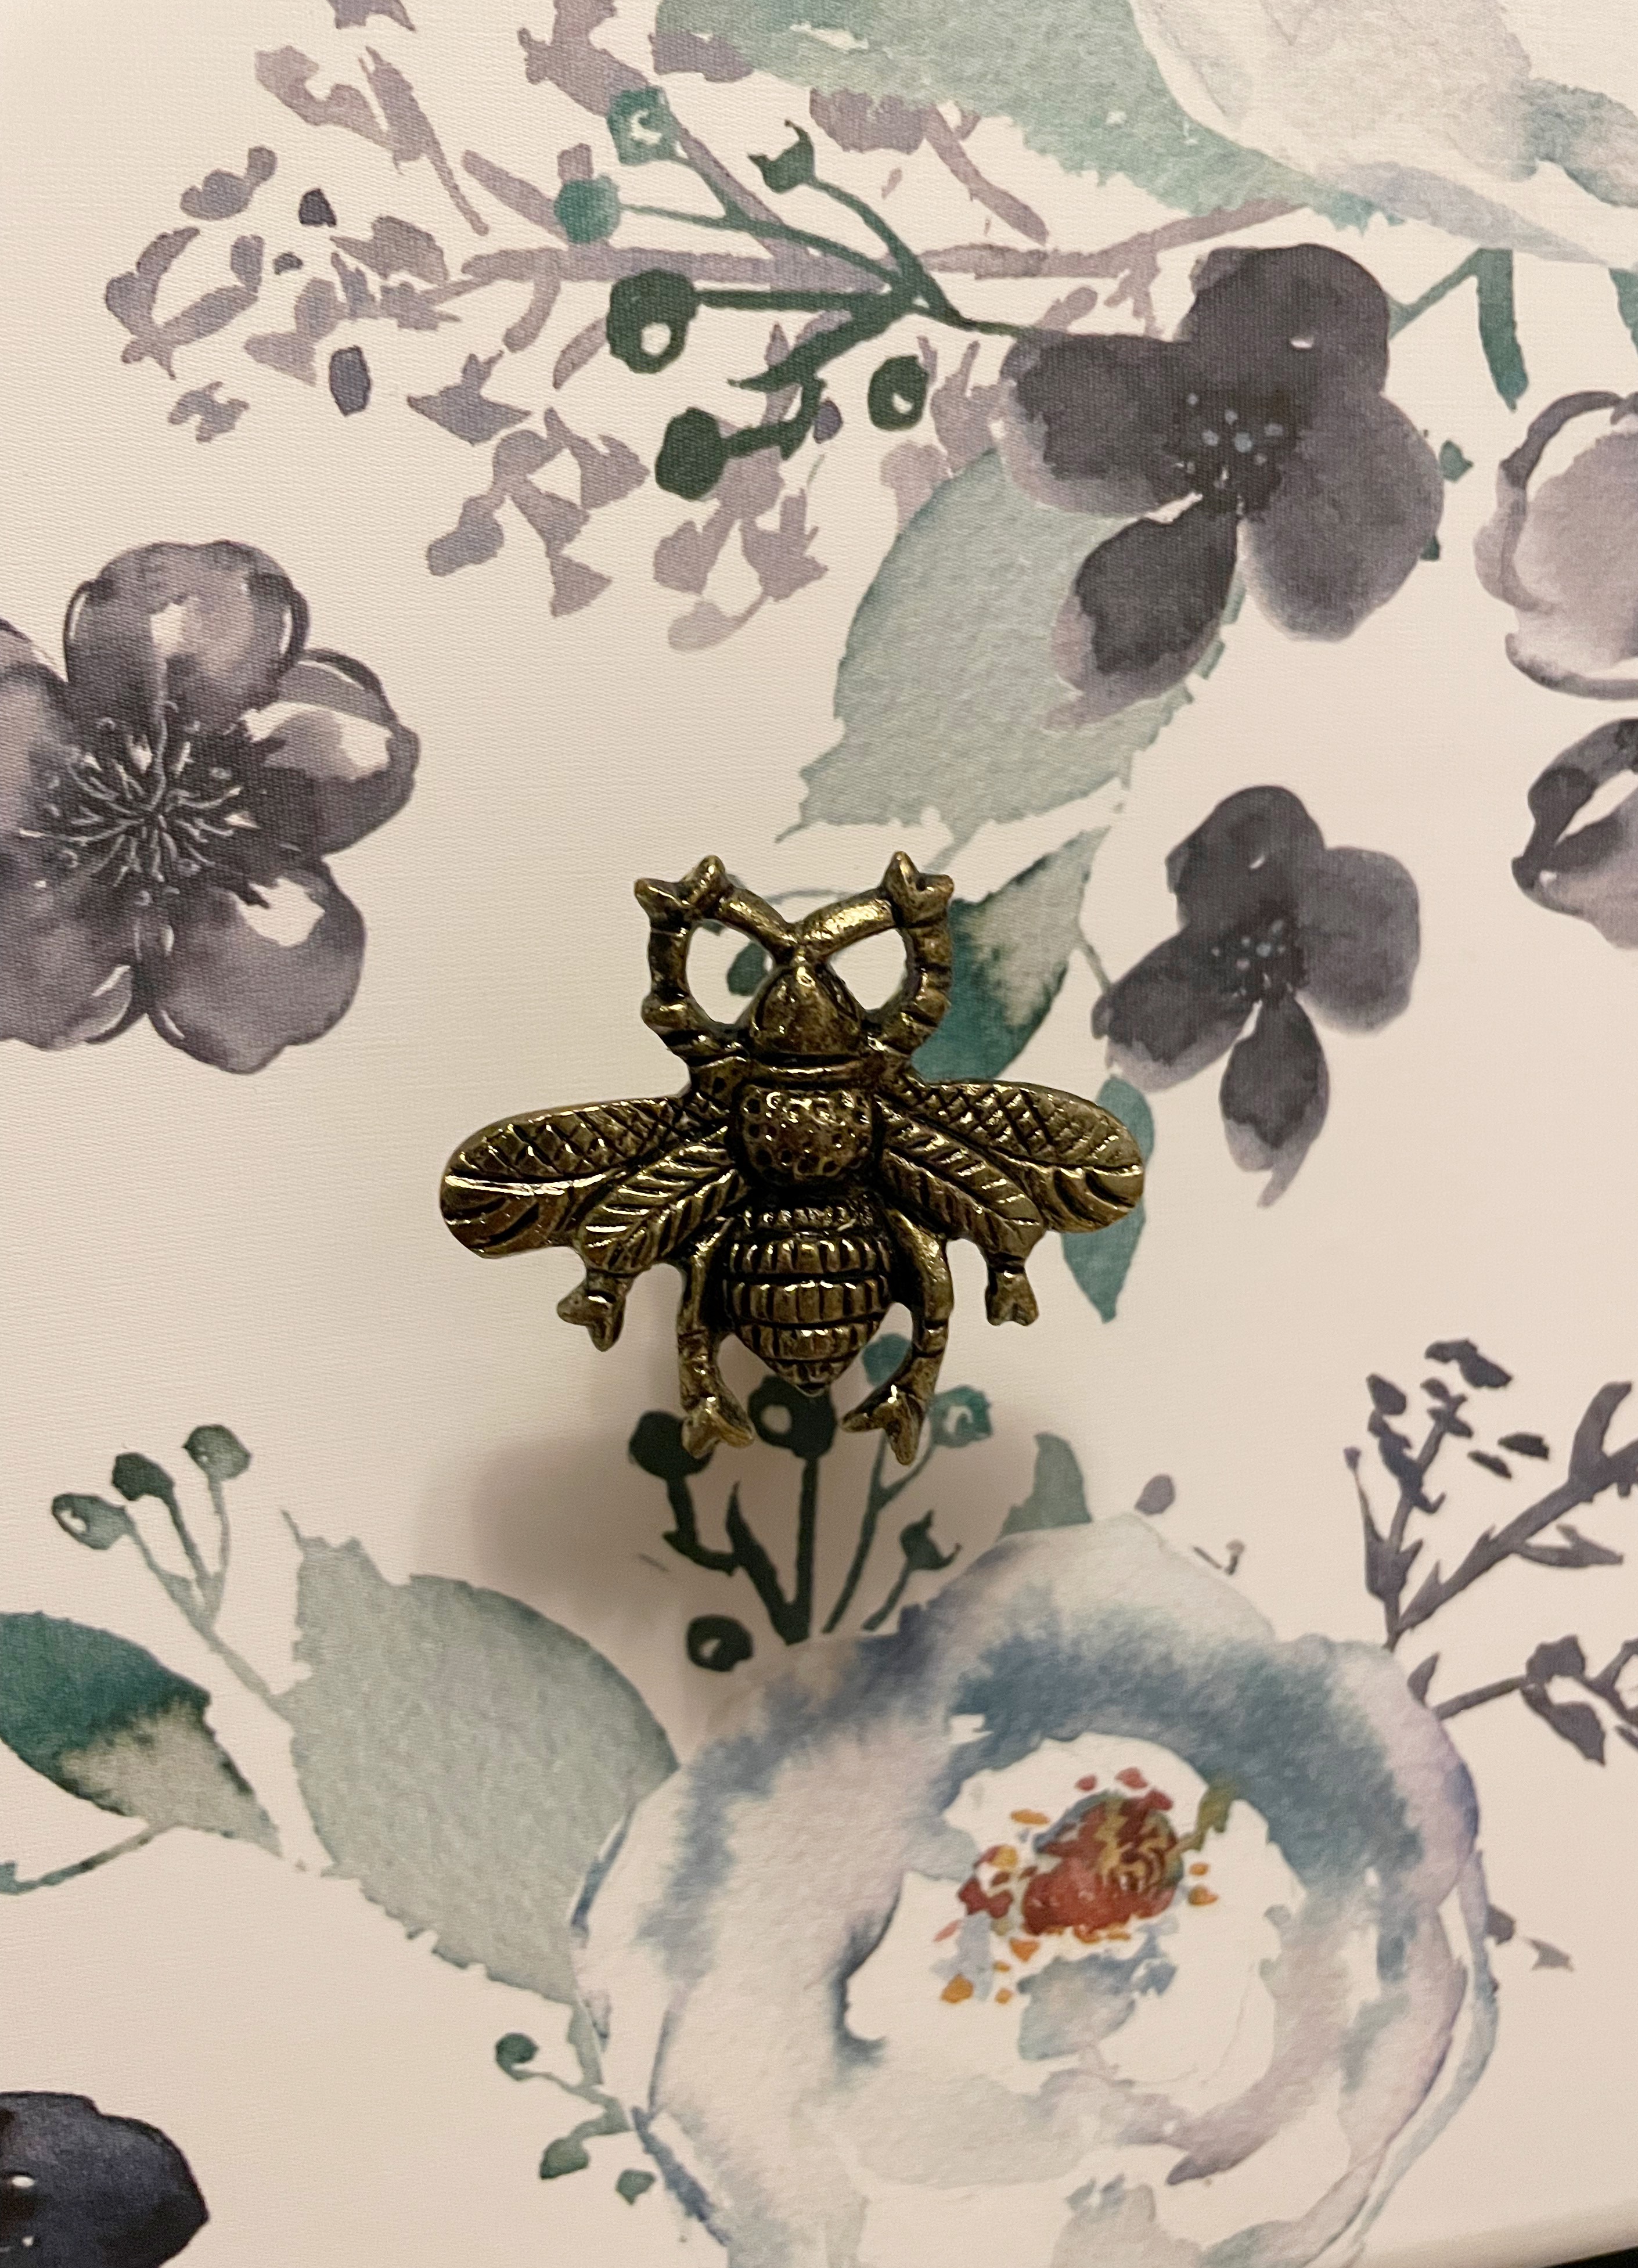
We do not know what gender we are having so I wanted to paint it something that would work for either gender—that I could either make more boyish or dress up to be more girly. I decided on a deep teal/navy for the dresser. Either way, I wanted to jazz things up a bit. I wanted to paint the outside of the dresser the teal and then do a wallpaper on the drawer fronts. I got on Etsy and found some wallpaper that I fell absolutely in love with (it is floral so my mom thinks it’s a little girly if we have a boy but I don’t think the baby will know that florals are traditionally more feminine) and found some snazzy bee knobs to keep things from being too sweet. (And too girly!)
Below are the steps I followed to update the dresser as well as some links to the paints and wallpapers that I like. Check them out and let me know if you have projects that you are working on. Find me on Instagram @Essentiallyemmamarie.com.
Steps for redoing a dresser
A few notes before we get started:
Disclosure
Please remember that this post contains affiliate links; that means if you click on the link, I will make a small commission at no extra cost to you. It’s a way to support my blog! I will only ever share an affiliate link if I love the product and think that you just might love it too!
1. Select the paint and wallpaper you want.
2. Remove all the drawers and hardware.
3. Lightly sand the dresser first. You don’t necessarily need to sand the drawers but doing a quick sand will help the wallpaper stick better.
4. Using a damp rag, thoroughly wipe all the dust from the dresser. Let dry.
5. Wipe again with a clean, dry cloth. I like using a microfiber towel for this.
6. Some paints require that you sand your surface first. Others will only require that you wipe and dry the surface. For the paint I was using I needed to do a light sanding first. (In my experience the paint typically takes better with a light sanding regardless.) You just need to sand enough to rough up the appearance of the finish—you don’t have to aim to remove all the finish. You can do this by hand or with an electric sander. You want a fine enough grit sandpaper that it will rough up the finish but not so much that you will have scratch marks to fill. Aim for 320-400 grit. I used an electric sander to speed things up. Don’t forget to wear a mask and protective glasses if you are sanding.
7. Wipe with a slightly damp microfiber cloth.
8. Wait a few minutes and wipe with a clean, dry, microfiber cloth to get all the dust off.
9. Now for the paint! Apply two light coats. If you need a third coat you can but it is always better to apply more thinner coats rather than fewer thicker coats.
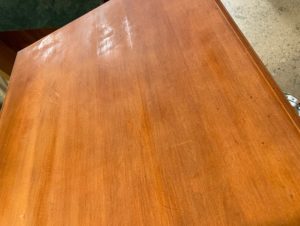
10. After the paint dries (the back of the paint can you are using will have directions for how long to wait in between coats and how long the paint takes to “set”), you can apply your sealer. I used a polyurethane sealer because I expect this dresser to take some hard wear and tear.
11. In the meantime you can apply your wallpaper to the front of the drawers. Wipe down the drawers and make sure they are clean and dry. Measure each drawer and mark your wallpaper (on the backside of the wallpaper) before cutting. If you are really nervous, you can unroll the wallpaper and set the drawer on the wallpaper to use as a pattern. Make sure to leave an extra half inch around all of the edges of the dresser.
12. It is easiest to do this step with someone: Set the drawer so it is standing upright with what will be the front of the dresser in the air. Have one person hold one end of the wallpaper as you peel away the backing from the other side. Lay the wallpaper on the drawer and smooth the wallpaper with your hand, or a straight edge, like a ruler, as you go to make sure there are no air bubbles.
13. Press the edges of the wallpaper around the drawer and square off the corners. You may need to apply decoupage or a type of glue to keep the edges in place depending upon the stickiness level of your wallpaper.
14. Taking a tool with a sharp point on it, such as an awl, small screwdriver, or long nail, puncture the wallpaper from the backside through the hole where the knobs were. Just make a small hole. Be careful!
15. From the front, insert your tool and wiggle it in a circular motion until the hole is big enough to fit your new knob through.
16. Insert your new knob and tighten with a pair of pliers.
17. You’re all done!
I hope this helps spark some ideas of ways you can redo and repurpose some items that you may already have around your home! If you do (or even if you don’t) I’d love to hear from you! Come connect with me over on Instagram! I can be found at @EssentiallyEmmaMarie.
Hey! May I Send You Something?
If you are here, chances are you just might like my writing. (wink) If you Drop your email address in the box below I’ll save you time by emailing you the link every time a new post comes out!
How is your new year going? Are you sticking with all your new commitments? Or are you struggling? If you are anything like me and enjoy a quieter start to the year, where you slowly start to focus on things that have a cumulative effect throughout the year then read on for a few of the tips that I have accumulated over time to help me maximize some of my time and streamline some of the more mundane tasks.
Disclosure
Please remember that this post contains affiliate links; that means if you click on the link, I will make a small commission at no extra cost to you. It’s a way to support my blog! I will only ever share an affiliate link if I love the product and think that you just might love it too!
What Should We Have for Dinner?
If you aren’t someone who loves to cook, or doesn’t have much time in the evening to cook, then this can be the most dreaded question of them all! I am a huge fan of meal planning and prepping ahead. (Check out my Meal Prep post here.) Preparing meals ahead of time for the coming week or next few days is a huge timesaver, but even that can be daunting. Where to start?
A lot of people find it helpful to have a meal prep matrix, where you always have a taco Tuesday for example, or soup on Sunday. This gives you a rough outline to follow every week. If you like to cook but can become easily bored with the recipes in your normal rotation, try dedicating one day a week in which you find yourself with a little more time to try a new recipe. Or go to a local farmers market or specialty food store and pick up a new food item that you’ve never used before. Then look that ingredient up on Pinterest for ideas of how to use it!
Even if you have no desire to prepare a week’s worth of meals, try doing a little bit of prep ahead on the weekends. Wash all your veggies when you come home from the store. Cut up veggies a head of time so that they are easier to grab to munch on when you are hungry—having a healthy snack ready a head of time can save you from grabbing a less healthy option later.
Laundry
I hear so many people bemoan the never ending mountain of laundry and I have to say—I don’t get it. I’m sorry but I don’t! Maybe it’s because we don’t have kids yet so we don’t produce quite as much but I don’t think that is the case.
What I have found that works well for me is to only do laundry once a week. Time management experts and studies have shown that while throwing in a small load of laundry everyday can make you feel like you are staying on top it, actually ends up taking more of your time each week than biting the bullet and doing all the laundry at once. I do laundry on Friday and Saturday. I only have one rule and that is all of the laundry has to be dried and put away before we go to bed on Sunday—otherwise it will be sitting there all week!
Another thing people often do that makes laundry take longer is breaking their loads into smaller portions than they actually need to. They have whites, lights, bright colors, dark colors, delicates, heavily soiled items, towels, and sheets. No wonder they dread laundry day! Yes, like colors should be washed with like colors but your white shirts and whites towels? They can be friends; wash them together! Do your sheets and any colored towels in one load. Heavily soiled rags and work clothes can often be washed together too. And what about the socks that go missing and never seems to have a pair even though a pair went into the washer? Try washing the socks all together in a mesh bag. This is especially helpful if you have little kids with little socks. You can even attach a Command hook to the inside of the closet or to the side of your laundry basket to hold the mesh bag and then every time you have dirty socks to dispose of, place them in the mesh bag so you don’t have one more thing to sort when laundry time comes.
If you produce a lot of whites and colors, try having two laundry baskets so clothing gets sorted as it is worn. As far as the actual wash and rinse cycle, my husband and I find that throwing in a load or two before work on Friday, and then switching out loads as much as we can Friday night into Saturday really helps. Unless your water has a really unpleasant odor and a really, really heavy amount of metal in the water, most of your items will be fine to sit for six hours overnight if you throw in a load before bed. It will finish while you are in bed and be ready for you in the morning. Try it!
The biggest pain point with us is clothes that aren’t quite dirty. They’re too dirty to go back into the drawer but not dirty enough to go into the hamper. Ever had that problem? We were able to greatly mitigate this dilemma by using command hooks. We put a few command hooks on the inside of our closet and that is where “almost” dirty clothes go!
Tidy Up
One of the things that I think makes the biggest difference in keeping a tidy home is to do a nightly tidy-up. In her book, A Simplified Life, Emily Ley talks about how at the end of each evening she grabs a laundry basket and goes around and gathers up all the miscellaneous stuff that has been sprinkled throughout the house. Her family all gathers around as she dumps the contents on to the floor and then everyone is responsible to put their items away. When you do a nightly tidy up like this, your house doesn’t have the chance to get too out of hand. It makes it easier to run the vacuum or do some touch up cleaning that might come up.
Cleaning
Speaking of cleaning, I approach cleaning the same way I approach laundry—once a week! This isn’t necessarily true of a few things, i.e., wiping the counters and running the vacuum, but for the most part, I do my cleaning weekly. I like my house to be pretty clean; I really notice when it is not, but the other advantage of cleaning weekly is that it doesn’t get the chance to get super dirty which means it cleans easily and more quickly than if I waited longer in between cleanings. For an in depth discussion of how to establish a cleaning routine that fits your life and schedule, check out my post, How To Get into A Cleaning Routine.
Buy the stuff
Have you had the thought at all while reading this, “Oh that reminds me I need to buy…?” I do this. A lot. I just bought a runner for in front of our sink that I’ve been wanting to buy for over a year and just never sat down and did. There are lots of little things like this. Projects are the same way—sometimes we have big project we want to tackle. Sometimes we have lot of little projects we want to do, such as cleaning out a closet. We put things off thinking when we have time we’ll do it and then we never have time.
Often instead of needing a huge chunk of time to do some of these things, what we really need is to make use of a few little pockets of time. In her book, Better Than Before, author Gretchen Rubin talks about how she established a power hour to tackle some of the tasks weekly that she always found herself putting off. If you have several little chores you want to tackle, or things you want to buy, make a list and then the next time you find yourself with 20 minutes and are debating what to get into next, pull out the list and get busy!
Your Schedule
Are you happy with how your new year has started? Are you feeling bogged down already? Take a good hard look at your schedule and ask what really has to be there—not what always has been there, but what really has to be there. I’m guessing work, maybe a religious commitment, and possibly one or two family commitments are all things that have to be on the schedule. Double check yourself before another year goes by of you doing things you don’t really want to be doing while you delay starting the things that you really want to do.
In her book, 13 Things Mentally Strong People Don’t Do, Amy Morin talks about the power of alone time and journaling. We get so crazy, so used to the constant influx of noise and content flooding our consciousness that we never take time to quiet our souls and decompress. Try taking 15 minutes to write down what you did in a day and to list one to three of the most important things that you have to do the next day and see if you don’t feel more at peace than you were with all of it floating around in your mind.
It is always my hope that these tips will help to serve you and bless you. I certainly don’t have it all figured out but these are all things that have helped us to simply and streamline our lives so we are better able to focus on what matters to us. I hope it will do the same for you! Here’s to a great 2022 for you!
Hey! May I Send You Something?
If you are here, chances are you just might like my writing. (wink) If you Drop your email address in the box below I’ll save you time by emailing you the link every time a new post comes out!
Christmas comes and goes so quickly but in Pennsylvania where I live, winter does not go as quickly. I always feel a bit bereft after taking down the Christmas tree and all of my Christmas decorations, so I decided a while ago that I wouldn’t take down all my Christmas decor at once. It is cold and, except for the sporadic snowfall, it is quite bare outside and will be for several more months. I don’t want the inside of my house to feel bare as well. I want it to feel cozy—extra cozy! Winter is a season too, after all, and I want to decorate for winter!
How I Decorate for Winter
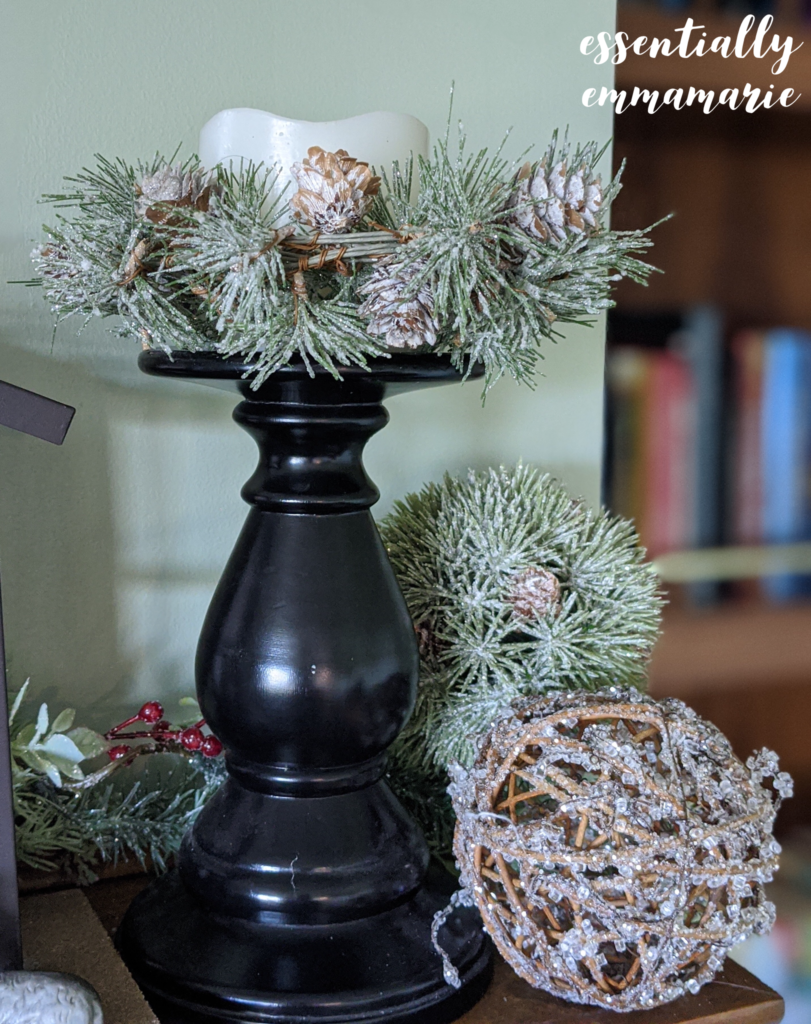
Since I just can’t quite cope with taking away all of my Christmas and winter decor at once, I tend to leave up greenery (if you use faux you have the ability to do this); I have little trees that look wintery and instead I only take down things that are expressly Christmas-related. There is some discussion over whether to leave up decor that is glittery and my feeling is this—if you like it, leave it, and if you’re tired of it take it down. I would say by conservative standards you should take down anything glittery, but since I like glitter to brighten up winter’s darkness, I leave it. Typically, I don’t use any red in my decor throughout the year except I do add in a touch or two of red in autumn and at Christmas. So I also take down most touches of red unless I have berries in with my greenery. As I said, we still have another two or three months of snowman-making weather so the snowmen don’t have to leave yet! I also keep up certain glittery accents as well—trees, frosted evergreen accent balls, silver deer figurines, etc. I love the look of white, glitter-dusted branches. I love it when the branches outside glisten with snow and frost and I love it inside as well—faux snow and frost that is!
My rule is:If it’s true in nature, it can be true in my decor!
Keep it Cozy
Think of your home decorated for Christmas in all its cozy goodness and what do you picture? Try stripping away all the elements that are overtly Christmas-y and leave all the candles, lights, and anything else that looks super cozy to you! This is what I call decorating for winter. Maybe you decide to take down the glittery accents and trees but still want something to make your home special through winter—think cozy! Throws, pillows, and candles can really warm up and transform a space. You want your decor to appeal to all the senses and in winter I love to appeal to the eyes and the sense of touch. It has been said that we feel texture with our eyes as well as our hands, so bring in lots of different textures. Replace pristine books with worn, warmer-looking books; faux fur pillows look soft and warm; woven baskets to chase away the sterile feel of a home devoid of Christmas.
Want other touches of winter? Here’s a quick list of some of my favorite winter decorating items:
Branches—bare branches in a big vase (These can be a show stopper!)
Pinecones
Evergreen and frosted evergreen branches
Candles, candles, and more candles!
Faux fur pillows and throws
Deer sheds (antlers)
Twinkle lights
Logs in the fireplace—even if it’s not a working fireplace!
Faux sheepskin throw
Remember What You Like
Scandinavian Decor
Over the last few years Scandinavian decor style has gained popularity. This style is known for lots of white, minimalism, and crisp, clean lines. Scandinavian decor also incorporates a lot of candles and faux fur, and evokes feelings of hygge. (The closest translation to this word is coziness, but think of being snowed-in in a cabin with a warm fire while the pine trees outside are covered in snow and you’ll get the idea.) If you’ve ever been a fan of this style of decor and wanted to try it, this time of year is a great time to add a few of these elements.
I want glitter and branches and basically want my home to transform from a Christmas wonderland to a winter wonderland for the next few months. What do you like? I think winter is also a great time to add more white to your decor than usual. Also, maybe you keep a pretty traditional-style home but would like to incorporate more vintage elements into your home—why not try it now?!
Maybe you are tired of some of the colors and decor you have been using as staples in your home, take this season as a little breather and an excuse to play and have fun with your décor. I think the number one reason we get bored with anything is because we stop having fun with it. So have fun! Check out my post on “Creating a Cohesive Color Pallet” as a springboard for ideas if you have the urge to switch up some of your décor.
Purge
Christmas came and with it a few new additions to my home, so after Christmas I love to purge and reorganize. It is a great time of year to ask yourself what things have you held onto for another year and still have never used. If you haven’t used an item and it is not an heirloom—pitch it!
Likewise, I like to do an audit of my home: where are the pain points? What drawer do I continually keep telling myself that I need to sort? This year I even switched a few things around in my kitchen to help it function better!
While growing up, it never was officially Christmas until I went over to grandma and grandpa’s and found peanut brittle in grandma’s crystal trifle dish, which everyone in the family called the “Peanut Brittle Dish”. When the peanut brittle appeared in the dish and grandma hung her little decoupaged sand dollars on the china cabinets’ handles, we knew that Christmas had arrived!
Grandma wasn’t a big decorator for Christmas, but she’s always been a big baker of Christmas candy. One year she sent some peanut brittle with grandpa to his office when he was working. People loved her peanut brittle and he came home with orders. She ended up making 100 pounds of peanut brittle that year.
I learned how to make peanut brittle from her, or from the best as I like to say, and below I’m sharing our recipe. Be sure to the read the notes following the recipe instructions because the details are what make for a successful peanut-brittle making experience.
Peanut Brittle
2 cups white sugar
1 cup water
1 cup Karo
1 lb. raw peanuts (these can be the Spanish or Virginia peanut but smaller peanuts are better and they must be raw—not already roasted)
1-¼ tsp. of fresh baking soda
1 Tbsp. butter
Extra butter
A candy thermometer
Get Started
Prepare a large baking sheet by spreading it well with butter. You want the sheet to be pretty large so the peanut brittle can really spread out when you pour it and not have it get too thick. Pick a cool dry spot where you can set your peanut brittle to cool. Place a trivet there because you will be setting a very hot cookie sheet on it to cool.
In a medium or large sauce pan, bring the water, Karo, and sugar to a boil. Boil on medium high heat until the candy thermometer reached 275°*. Stir occasionally. Once it reaches 275°, add the butter and peanuts and start stirring constantly. The mixture will get very thick and hard to stir, but as it cooks it will thin out again. You really need to stir constantly and make sure that you are scraping all areas of the pan so that nothing burns.
Next comes the tricky part: as the thermometer start to reach 290°-295° quickly pull out the thermometer, remove the pan from the heat, pour in the baking soda, and quickly stir the peanut brittle—it will start to foam. As soon as it is foaming evenly throughout, pour onto the cookie sheet. You can gently push it out to the edges of the pan but you don’t want to crush too much of the foam—the foam is what makes it nice and crunchy!
Carefully pick up the cookie sheet and take to the spot you prepared to allow it to cool. It will need to cool for about 30-40 minutes depending on how cool and dry your spot is. Once it has cooled, gently twist the pan so the peanut brittle pops off in one large piece. Flip it over and, using a paper towel, wipe the butter from the back of the peanut brittle; then, with a metal spoon, whack the back of the peanut brittle and watch it crack into pieces. Continue doing this until you have gotten the pieces the size you want. Store in an airtight container and enjoy!
*This will take a while. I don’t recommend turning the heat up the whole way because you can burn the mixture. Allow it to take its time so it can thicken. This will take around 30-40 minutes depending on your stove.
When it comes to adding the baking soda, you want this to be a very quick process—as in seconds. As quickly as you can, remove the thermometer, remove the pan from the heat, add and stir the baking soda, taking no more than 30 seconds.
It is very important that you have a cool dry place to allow the peanut brittle to cool. If you don’t, it will get sticky and good luck trying to eat sticky peanut brittle! Also, once it has cooled, break into pieces and store immediately, again to avoid it from getting sticky.
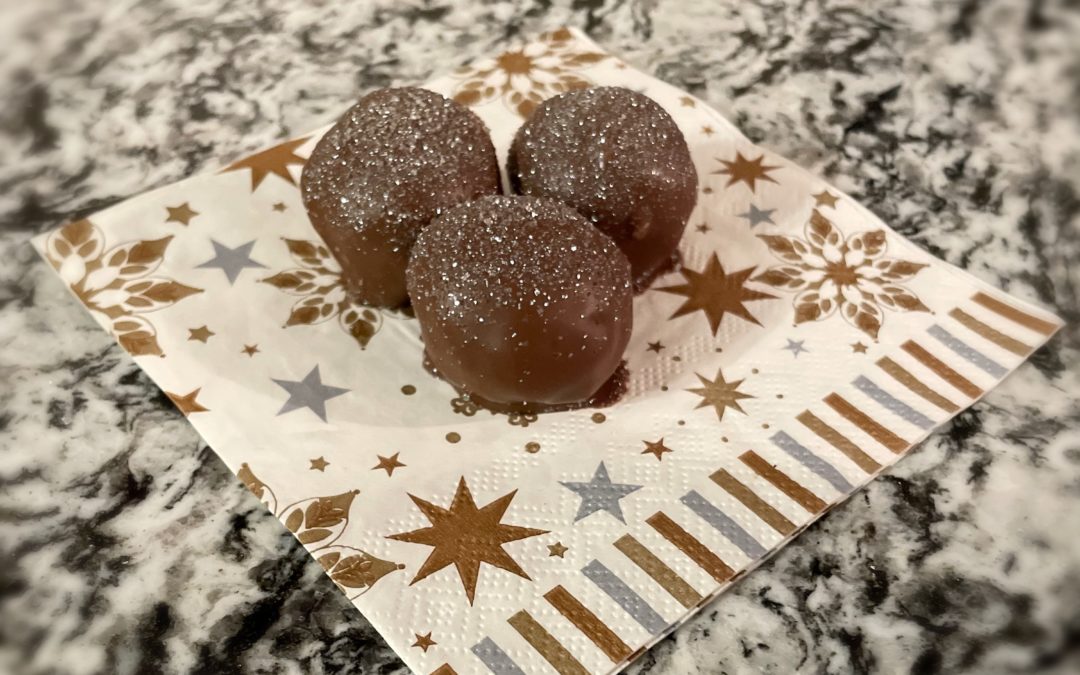
Oreo Truffles
1 package of Oreo cookies
1 package of cream cheese (make sure you get the original kind)
1 bag of melting chocolate
Get Started
Crush Oreos in a food processor or put the Oreos in a plastic bag and crush with a rolling pin. You want the Oreos to be crushed into a medium/fine consistency.
Heat the cream cheese till dry soft.
Combine Oreos and cream cheese together. Using a spoon or cookie scoop, form into to small balls—about an inch in diameter, and place on a cookie sheet.
Chill the formed balls in the fridge for about 30-45 minutes or about 20 minutes in the freezer. You want the balls to be hard to the touch but you don’t want them to actually freeze.
While the balls are setting up, start to melt the chocolate in a melting pot or double boiler. You will want to stir constantly while the chocolate is melting. If you are using a fondue pot or melting pot, I recommend not keeping the heat on high after the point when the chocolate has just melted. If you keep it on high the entire time, your chocolate will most likely burn. What does burn chocolate look like? If the chocolate is melted but you are seeing clumps form that you cannot blend out, then your chocolate has burnt. It will still taste more or less ok if this is just beginning to happen, but not if it continues.
After the balls have set and the chocolate is melted, dip the balls into the chocolate and allow to cool on a wax-paper lined cookie sheet. If you want to add sprinkles or decorations to your truffles, do this right after placing them on the wax paper, before the chocolate has time to cool.
Allow the chocolate to set and cool entirely and once it has—enjoy!
Hey! May I Send You Something?
If you are here, chances are you just might like my writing. (wink) If you Drop your email address in the box below I’ll save you time by emailing you the link every time a new post comes out!
The winter weather always inspires me to get a little more crafty. I think this is due in part to the fact that there are all kinds of cute decor out there that can be made and in part because when I was growing up our community would host a community craft show for several days where you could open your home to the public in the hope they would purchase the crafts that you made. We would participate with our neighbors in this holiday craft show; the weeks leading up to it would have my mother and I furiously crafting in an effort to have enough inventory for the show. The crafty bug has hit me again and I have two Christmas ornament crafts for you!
Do you have left over Christmas cards that are too pretty to throw out but you have no idea what to do with them? I have a craft for that!
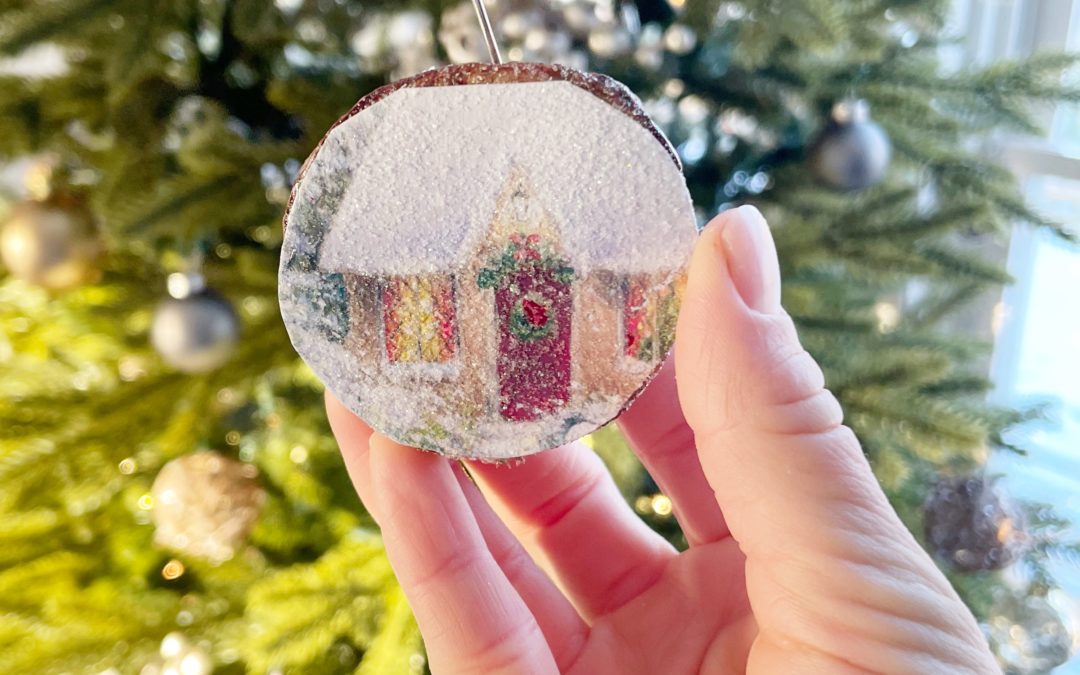
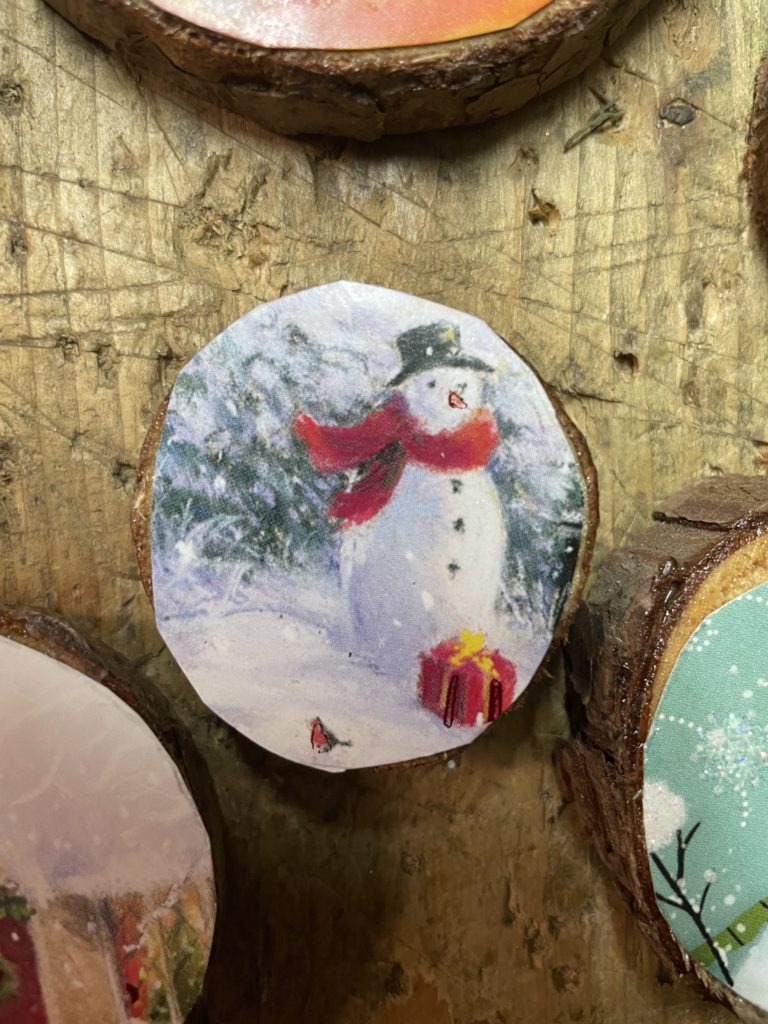
Christmas Card Ornaments
· Choose a variety of Christmas cards with small pictures on them.
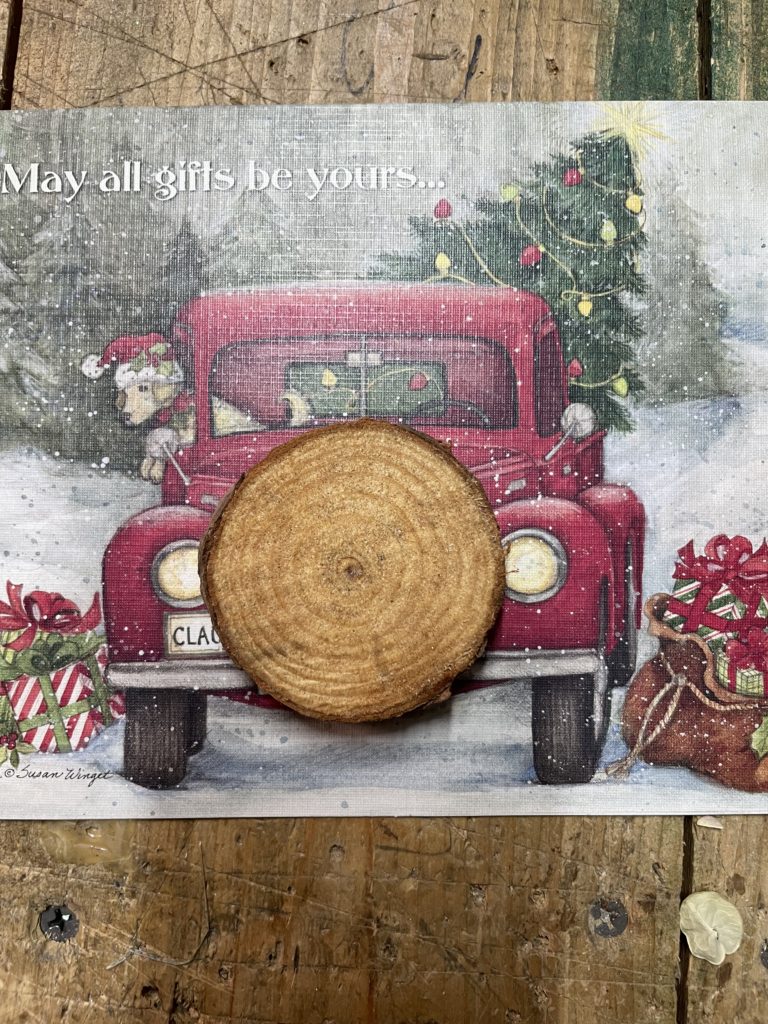
· Select a pre-cut wood slice and lay it on top of the Christmas card.
· Using the wood chip as a pattern, outline the wood chip on the card then cut it out.
· Use decoupage to coat the wood chip and lay the cut-out card on top. Turn the chip upside down or use wax paper as a buffer and lay a book on top to help encourage the card to adhere smoothly to the wood chip.
· Let dry.
· Coat the front and the back of wood chip with decoupage. Let it dry, then coat a second time.
· If desired, spray with spray glue and dust with glitter.
· Spray with sealer.
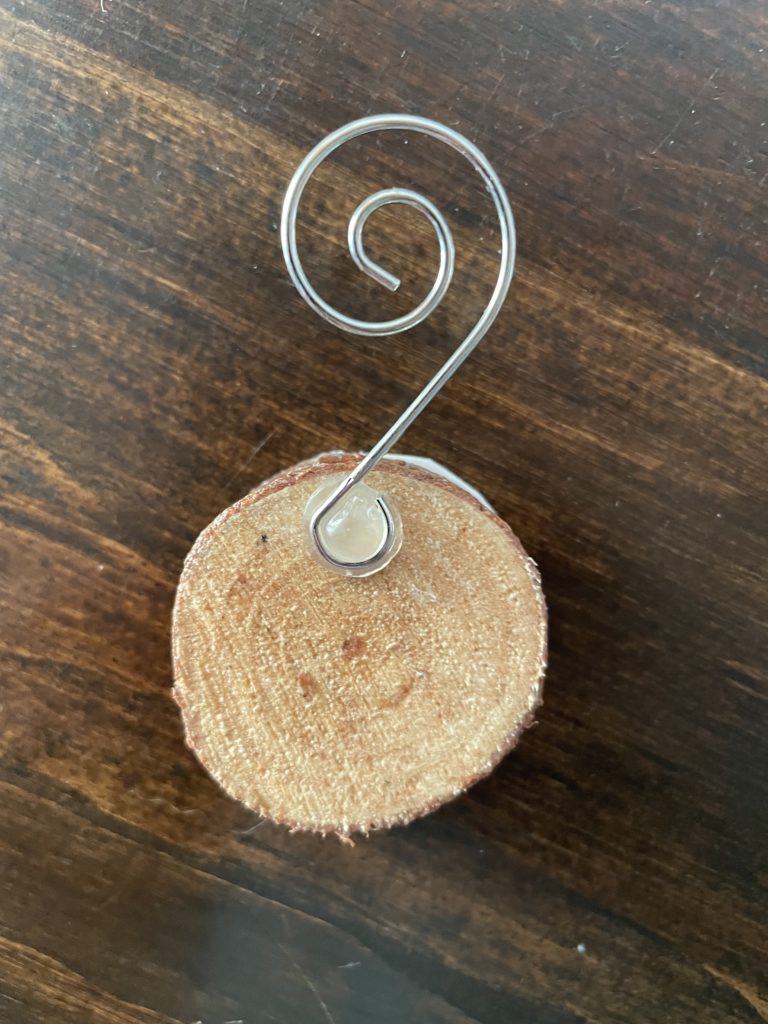
· Hot glue an ornament hook to the back of the wood chip.
· You’re done!
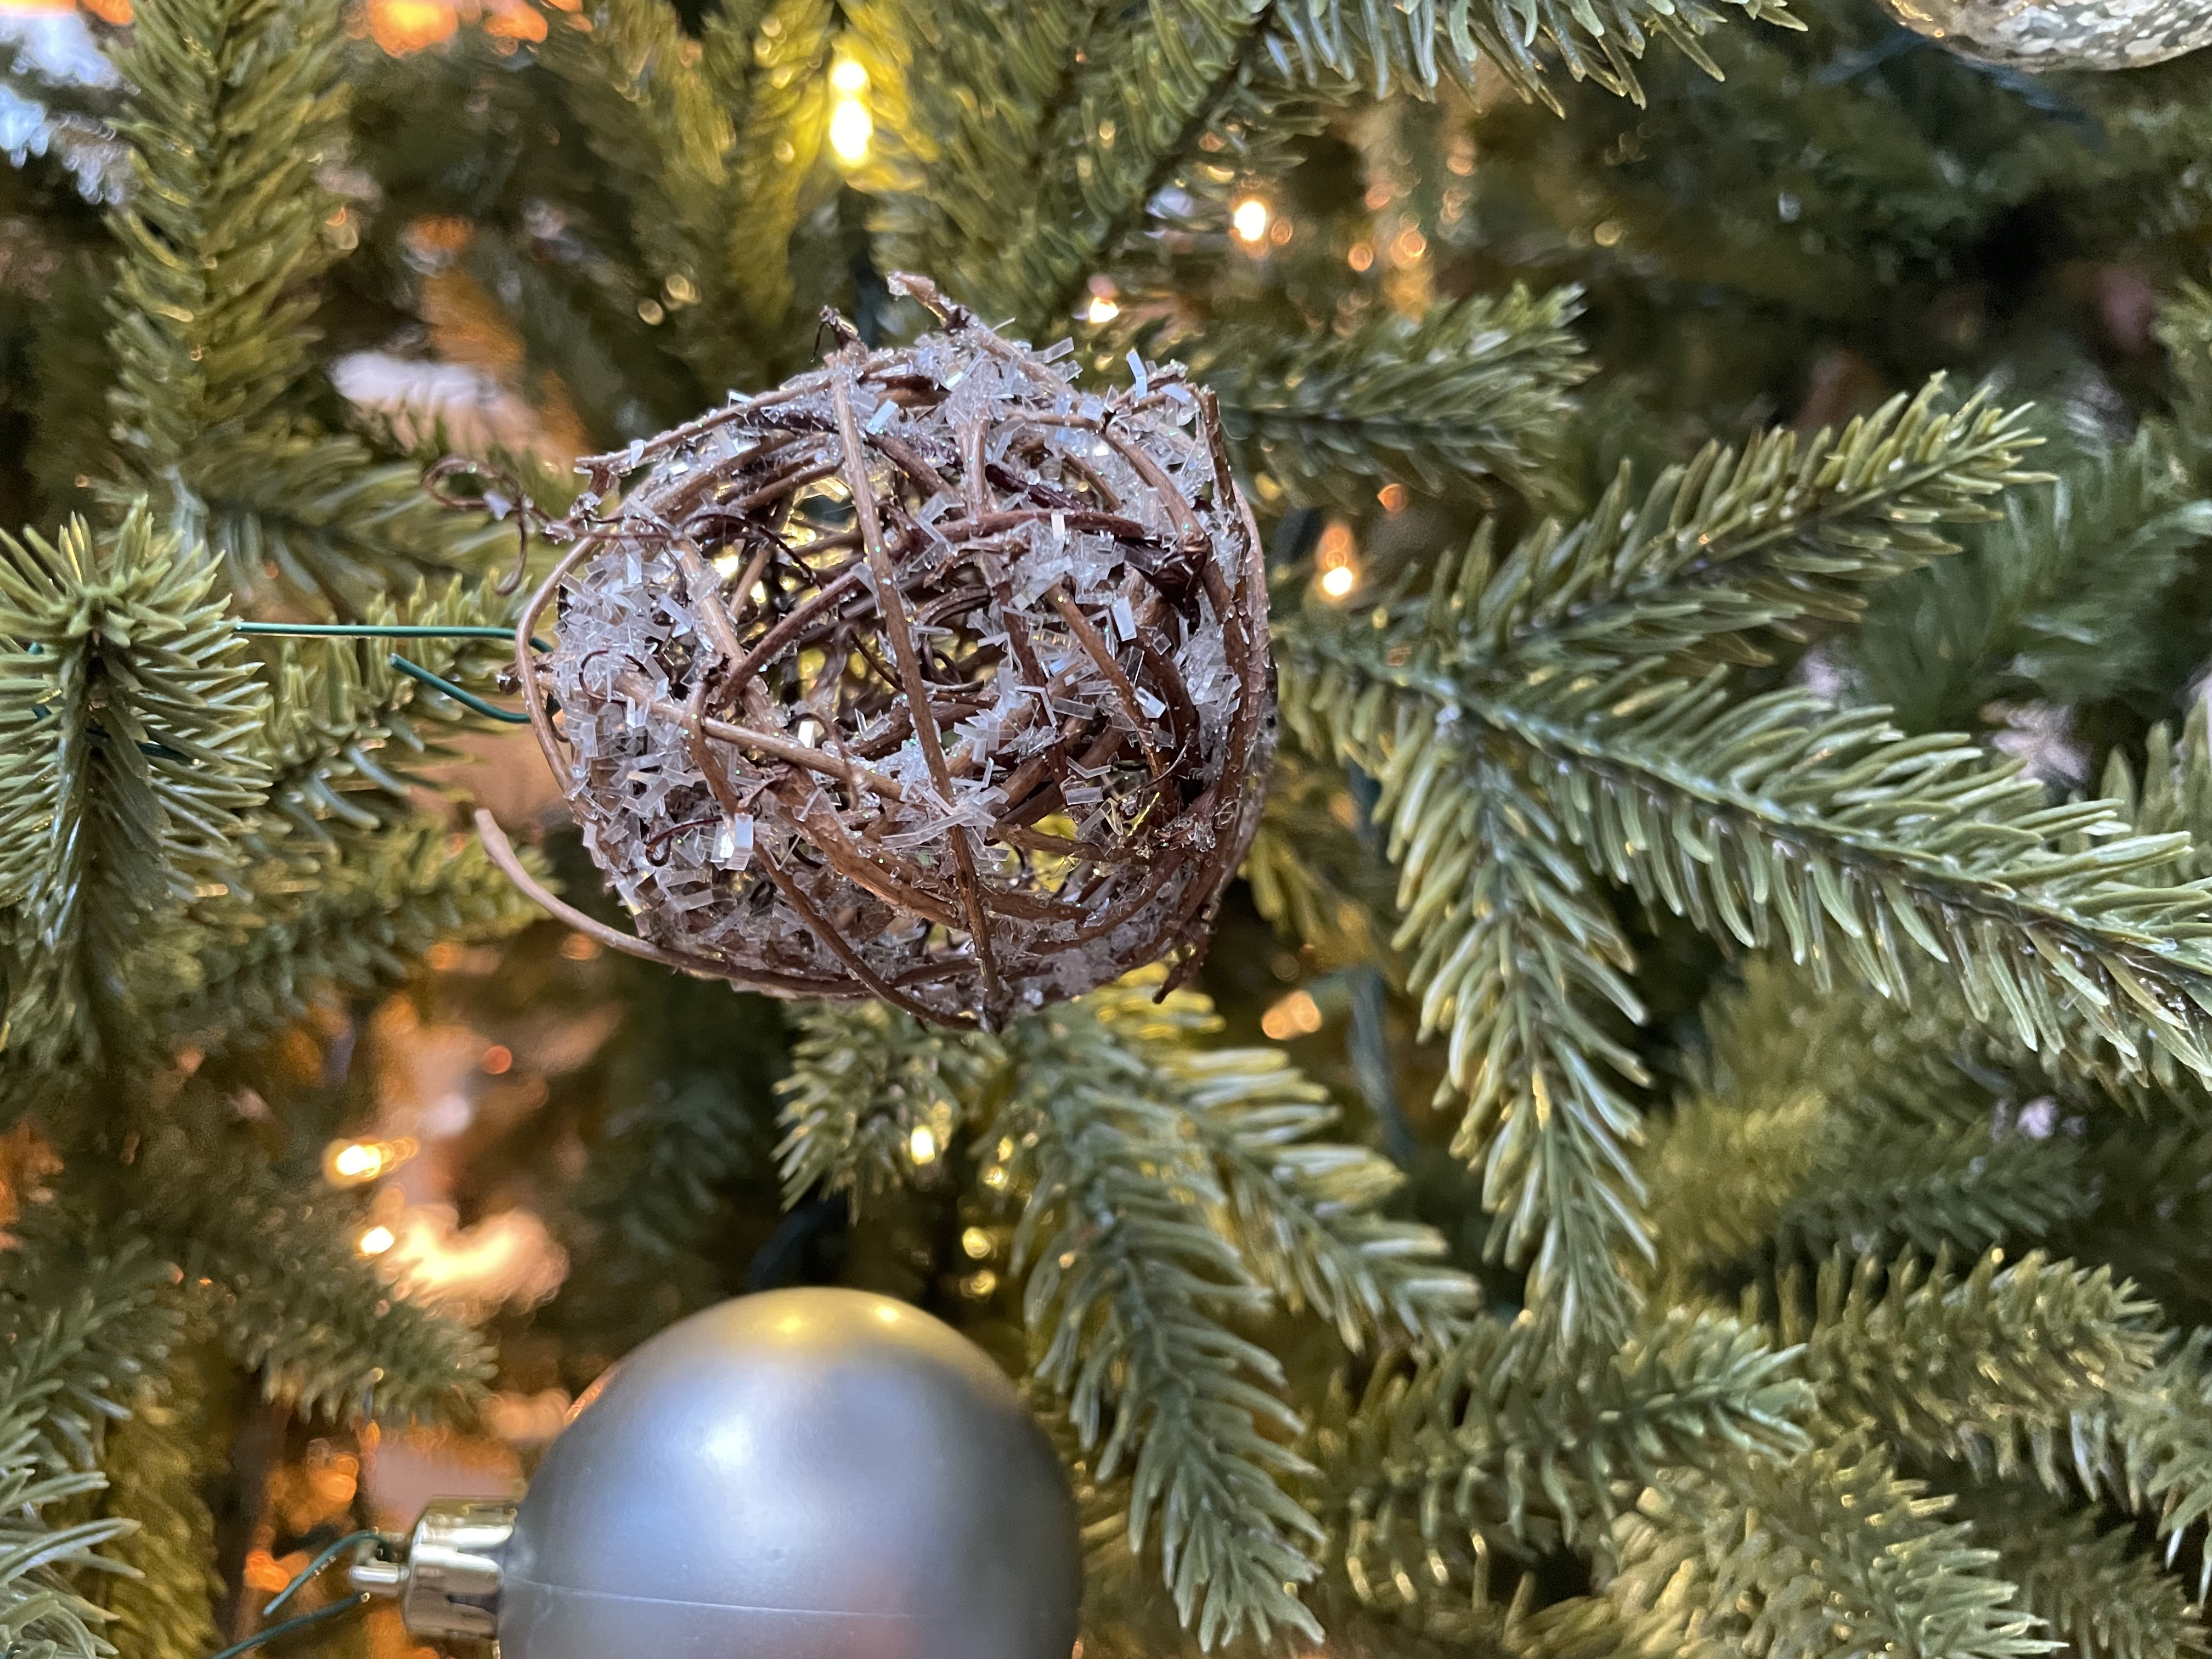
Snow-Covered Twine Balls
I love twine balls and I think they look just gorgeous on a Christmas tree. For these ornaments:
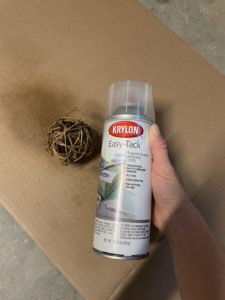
· Start with a bare twine ball. (You can also do this with pinecones.)
· Spray with spray glue.
· Immediately role in glitter.
· Let dry.
· Repeat steps 2 and 3 until you have your ball covered thoroughly (or as much as you want).
· After the ball has dried, take a hot glue gun and adorn randomly with little pearls and crystals. Let the hot glue cool.
· Attach a hook: you could use fishing line, a regular metal ornament hook, or a fancier one like I did.
· In a well-ventilated area spray the ball with a clear coat of sealer to help minimize glitter loss.
· You’re done!
I hope these ideas will help inspire you if you are looking for some Christmas crafts to do on your own or with your family. Happy crafting!
Disclosure
Please remember that this post contains affiliate links; that means if you click on the link, I will make a small commission at no extra cost to you. It’s a way to support my blog! I will only ever share an affiliate link if I love the product and think that you just might love it too!
Hey! May I Send You Something?
If you are here, chances are you just might like my writing. (wink) If you Drop your email address in the box below I’ll save you time by emailing you the link every time a new post comes out!
Are you ready for Christmas? I am so ready! I love all the days in the holiday season starting with Thanksgiving, from getting out and doing a little shopping on Black Friday to going out and getting a real Christmas tree. I love shopping for presents; I love wrapping presents; I love baking with family; I love the Christmas parties (probably the only kind of parties that this homebody gets excited about!), but I have to say above it all, one of my most favorite activities of the Christmas season is decorating my house! It’s almost makes the whole ordeal of growing up, finding a way to earn an income, and paying bills worth it!
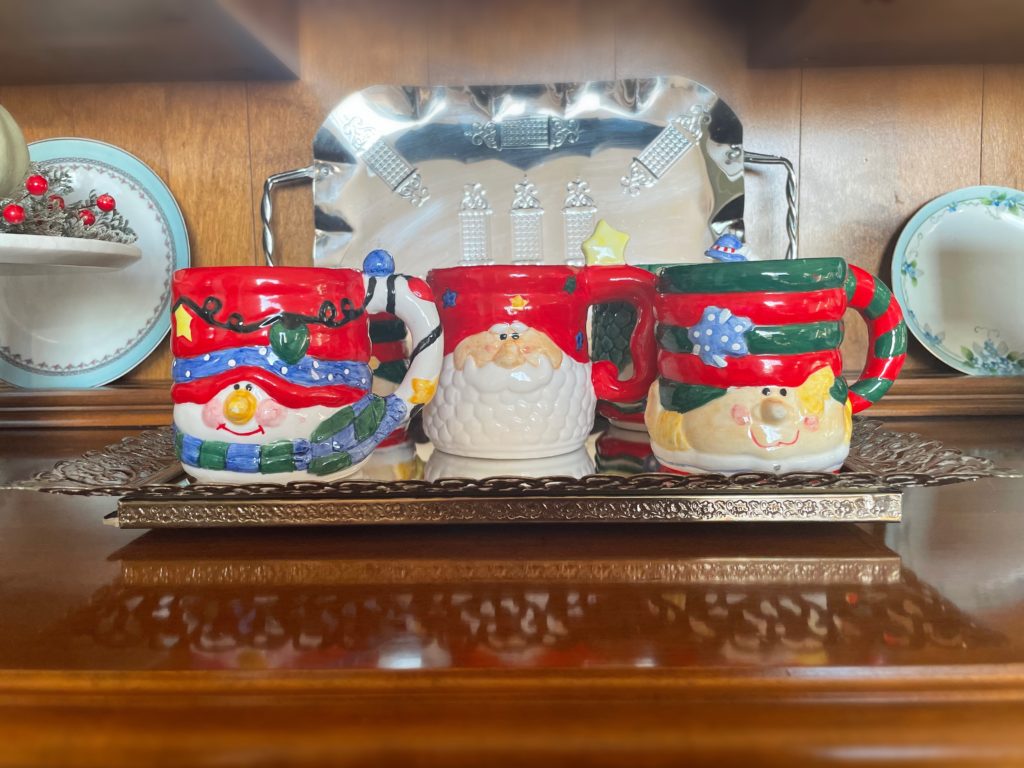
For me, the beginning of the Christmas season looks like this: Thanksgiving Day, followed by Black Friday when my friend and I spend a day together and do a little shopping; Saturday—the Christmas explosion! I look forward to the beginning of the season when I can pour some hot chocolate or coffee into one of my Christmas mugs and pull out the decor and let the creativity start flowing. I think an important reason why I enjoy it is that I don’t treat Christmas like a chore. I don’t have kids yet and therefore the holiday is greatly simplified. We know that the way in which we approach things greatly affects the outcome so I urge you not to be a grinch this holiday season. If the thought of pulling out lots of decorations is simply too stressful, then don’t! Pull out a few key pieces and let it go at that.
Here is a little list to help you manage the stress this holiday season:
· Start thinking about the holidays—how many people do you have to shop for. Start making a list and a budget of how much you plan to spend on each person. What about your Christmas décor. Do you need anything new? Now is the time to start making lists and checking them twice.
· Are you sending Christmas cards this year. Thanksgiving can be a great time to take that photo since everyone is already cleaned up and there is usually an extra person or two around to snap the family photo. Through places such as Walmart, Target, or Walgreens you can design your Christmas card online and then swing by the store to pick them up the next time you do your shopping.
· Hopefully you can start buying some Christmas gifts. Maybe you have a day you can dedicate to this task, maybe you have to do it in fits and starts, but by starting in November and finishing it at the beginning of December, will help take a load off your mind.
· Wrapping: can you wrap a little on a Saturday morning before your kids get up? In the afternoon before your husband gets home from work? Whenever you can, try to squeeze in a few minutes for wrapping here and there. Turn on some Christmas music or a movie, and take the opportunity for more hot chocolate or a cup of your favorite coffee and enjoy!
Now about the actual décor . . .
Just like starting to think about your Christmas shopping list, start thinking about your Christmas decor. Were you short a strand of twinkling lights last year? Did the tree look a little bare and need a few more ornaments? Start planning where you want to put things and make a list of things you need to pick up.
In my post “Alternative Christmas Color Palettes.” I talk about using nontraditional Christmas color palettes in your home but what about other ways to add touches of Christmas to your home?
From The Outside Looking In
Even if you are not a big fan of hosting, this time of year makes it almost inevitable that you will be having someone over at some point. Create a welcoming front door with a beautiful wreath, or a festive door mat to help welcome your guests.
The Tree
I am not going to spend a lot of time on this one, but it is my opinion that everyone should put up at least a little tree. To me, Christmas trees are nondenominational and I think everyone should have one! I love a colorful tree with collected and handmade ornaments that tell the story of a family and a life. My aunt has given me a special ornament every year since I was born—and these ornaments are handmade, unique and gorgeous! It was so nice to have these special ornaments to adorn our Christmas tree when my husband and I were first married and had such a small ornament collection. I also see the beauty in a curated tree with a carefully selected color scheme—just make sure you’re leaving a little room for sentiment in decorating your tree.
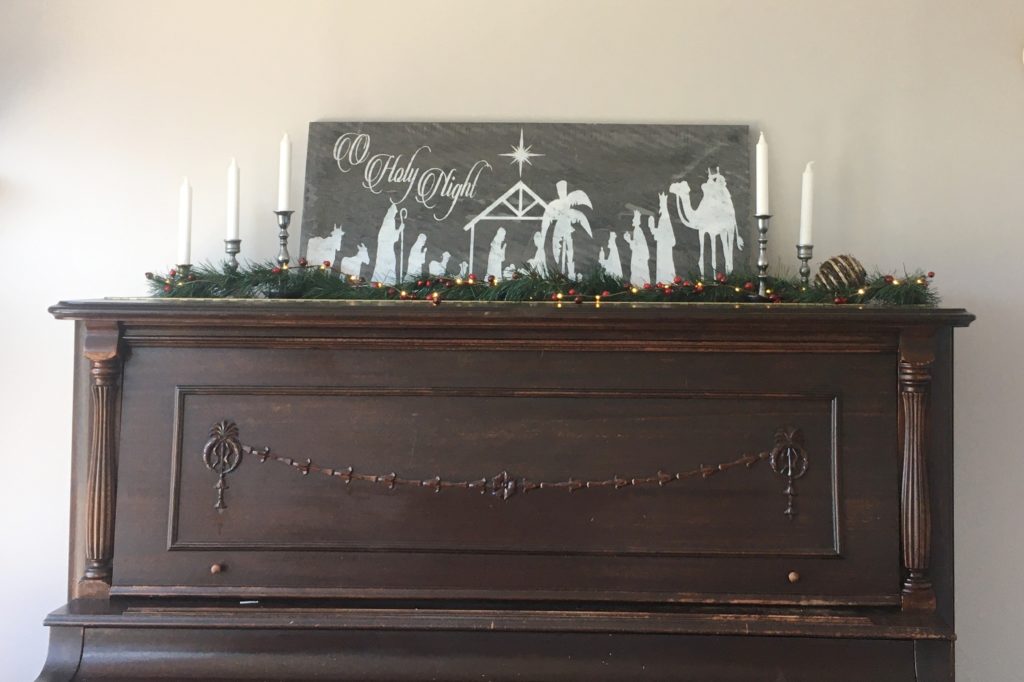
The Mantle Or Other Large Surface Area
Mantels are such a fun space to decorate! I feel like I have two mantles because I have my actual mantle and the top of my old upright piano. If you have a mirror above your mantle, hanging a lovely wreath can be a great touch. Adding greenery and some twinkle lights is a classic look; from there you can go any in direction with your decor. I love the look of lots of candles clustered in the middle of the greenery and then letting it go at that. I am also a fan of working a manger scene into your mantle. You can add a grouping of Christmas signs into your mantle, or make a little village with porcelain houses and bottle brush trees, or use a variety of miniature Christmas trees to make a little forest clustered on your mantle.
Vignettes
You didn’t think I would skip over vignettes did you? If you are doing really a low key, simple Christmas décor, this year think of adding a vignette or two throughout your home. These can add some holiday cheer without being a lot of work! Here are a few ideas I like.
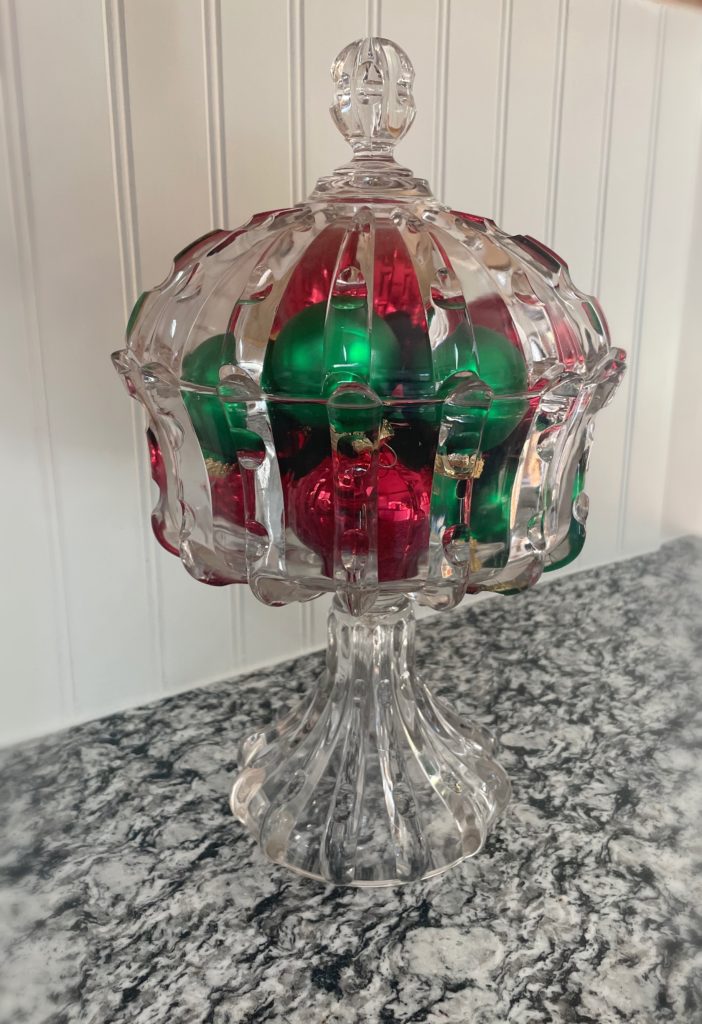
· A bowl full of ornaments.
· A tray with a candle, some books, a gold or silver deer figurine, and a faux tree.
· A faux tree with a deer and an accent ball.
· A closh with a sprig of greenery, a pinecone, and an ornament.
· A faux tree, candle, and festive holiday sign.
The Table
I usually just have a runner on my table but sometimes at Christmas I get fancy and pull out a full-fledged tablecloth. See my post of my table’s Centerpieces Throughout The Seasons for some ideas of how to tweak what you may already have going on on your table. In addition, you could do a nice vignette or a beautiful bowl with some ornaments—just keep in mind when decorating your table that you will most likely be hosting more than normal this season so don’t make the centerpiece too big or too cumbersome to move. In addition, if you are using a tablecloth and need to insert a table leaf for when guests comes over, make sure your tablecloth is large enough to cover your table.
A Few Other Touches
Depending on how crazy you want to go with your decor this year, here are a few other touches that are very nice and very festive!
Mini wreaths on your cupboards or back of dining room chairs.
· Add a faux tree to your hand soap and lotion in your bathroom or by your sink.
· Pull out the Christmas dishes! You don’t have to wait for company to use those gorgeous dishes! Use them as decor, set them out ready for use—but either way, don’t forget about them!
· Accent pillows—add some Christmas cheer to any room!
Hopefully this will get you excited for the season! Regardless of how much you do or don’t care to decorate for the season, I hope you will find at least a few minutes to spend time with family and friends, slow down, and remember the reason for the season.